
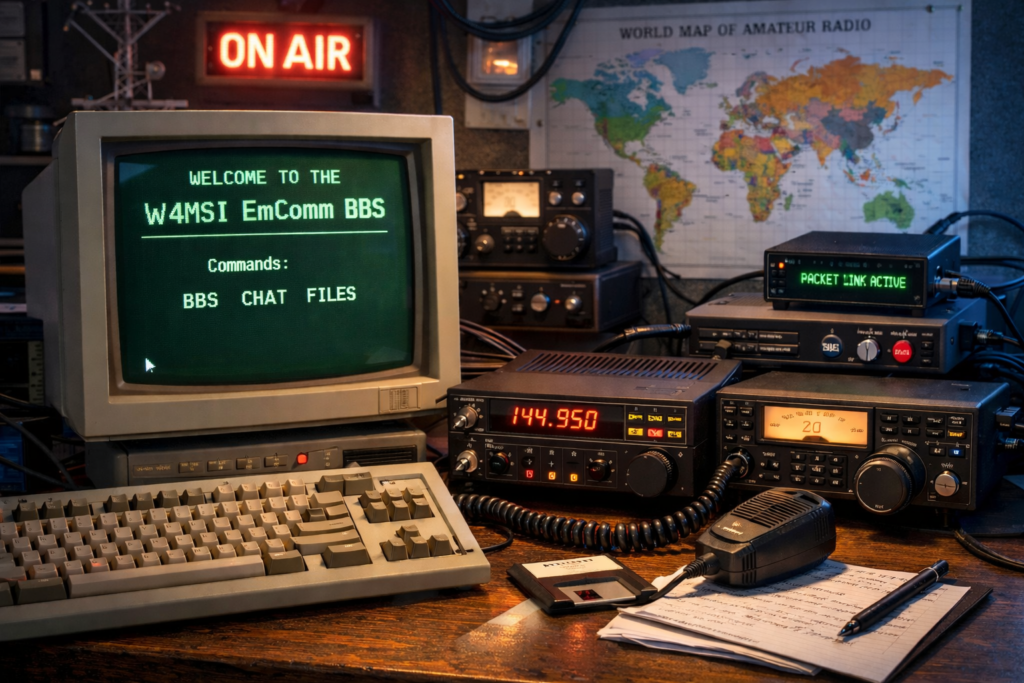
I’m excited to announce that I have my new Packet Radio Bulletin Board System (BBS) up and running. It is co-located here at the repeater site in Todd County, Kentucky. Station information is listed below. For the time being it will be VHF only but I may eventually add UHF and/or HF capabilities to it.
What is a BBS anyway? A Bulletin Board System (BBS) is a computer system that users connect to remotely to exchange messages, download and upload files, read bulletins, and participate in discussions. Before the modern internet existed, BBSes were one of the primary ways people communicated digitally over long distances.
BBSes originated in the late 1970s, when early computer hobbyists connected systems together using dial-up modems over telephone lines. A user would “call” a BBS, interact through a text-based menu, then disconnect so the next user could connect. Throughout the 1980s and 1990s, thousands of BBSes existed worldwide, forming loose networks that passed messages and files between systems during scheduled connection windows.
Amateur Radio operators adapted the BBS concept to radio using packet radio, which transmits digital data over VHF, UHF, and HF frequencies. Traditional packet radio systems rely on the AX.25 protocol, allowing computers to exchange data using Terminal Node Controllers (TNCs) and radios without any dependence on telephone or internet infrastructure. These packet BBSes enabled store-and-forward messaging, technical discussion boards, weather bulletins, emergency traffic, and file distribution entirely over RF.
Modern packet radio BBSes, including systems like this one, build on that foundation while also supporting newer digital modes such as VARA. VARA provides significantly higher throughput, better error correction, and improved performance under poor propagation conditions, especially on HF. By supporting both classic AX.25 and modern VARA modes, today’s BBSes preserve compatibility with legacy equipment while taking advantage of advances in digital signal processing.
Even today, BBSes remain relevant. They offer a self-hosted, infrastructure-independent communication platform that functions without the internet, cloud services, or centralized providers. Modern amateur radio BBSes are used for emergency communications, experimentation, education, and preserving digital radio history, while still providing a practical and resilient way to exchange information over RF.
BBS Station Information
Frequency: 147.500 MHz
Node: W4MSI-7
Modes: AX.25 / VaraFM
Power/Antenna: Currently 40w / Omni
BBS Commands:
- BYE – Disconnects
- INFO – Displays information and guidelines about the BBS
- BBS – Connects to the BBS application
- A – Abort Output
- B or BYE- Logoff of BBS application and Disconnect
- NODE – Logoff BBS and go back to main terminal
- I CALLSIGN – Looks up known info for a given callsign
- K – Kill Message – Deletes message “K 37” would delete message 37
- L – List Messages – Lists New Messages/Bulletins that you haven’t read yet
- LL num – Lists the last “num” messages. “LL 5” would list the latest 5 messages even if they’ve been read already.
- LM – List Mine. Lists messages addressed to you.
- LB – Lists bulletins even if they’ve been read already
- LP – Lists private messages even if they’ve been ready already
- LC – Lists the “to” field of all active bulletins
- FILES – Lists files available for download
- YAPP – Download files using yapp protocol
- ? – Help – Shows list of these and other commands/information.
- ***To Download a File*** first list the files with FILES — Then use the YAPP command to download the file… yapp filename.txt —- This will download the file to your yapp files directory. To open that directory, in EasyTerm, click file in the top left, then click Open YAPP Directory and you can view your downloaded files there.
- ***To Upload a File*** first make sure you name your file locally using the correct naming convention, that way we can keep things straight for months/years to come.
Date-description [yyyy-mm-dd-description]
||EXAMPLE|| text file upload. You would name the file as follows…
2026-01-20-WinterFieldDay-Plan.txt
- Then in EasyTerm, click the YAPP button at the top, select your properly named file and click open. EasyTerm will then upload your file to the system.
- Then in EasyTerm, click the YAPP button at the top, select your properly named file and click open. EasyTerm will then upload your file to the system.
- CHAT – Connects to the CHAT application for chatting with other currently connected users (think old school instant messenger).
- /h – gives command summary for CHAT application including these commands and more
- /U – shows connected users
- /Q- enter your QTH
- /T – show topics
- /T Name – Join Topic (name) or Create a new Topic. Topic Names are NOT case sensitive
- /A – Toggle alert on user join
- /S CALL Text – Send Text to that station only
- /B – Leave CHAT and return to main terminal
- /QUIT – Leave CHAT and disconnect
What Do You Need To Connect
Older BBSes utilized hardware TNC’s. In today’s world, we don’t need those expensive/limited devices. All you need is a soundcard interface that can connect your radio to your computer. I personally love the “DigiRig Mobile” devices as they work great, have a fair price and are simple to work with. However, there are other options that will work well also. The key is to get your soundcard interface and appropriate cables to go from your radio to the soundcard, then it’s just as simple as a USB cable from the soundcard to your computer.
Amazon Affiliate Links


Once the radio is connected to the computer with the soundcard interface, you will need to install a few applications on the computer. These will be used to interact with the audio signals from the soundcard, initiate send the PTT signal to key up the radio for transmit and of course type/communicate with the BBS.
Let’s start with the AX.25 option. You need a program called “SoundModem” which will be your software based TNC interacting with the soundcard. Next you need your terminal program. The same guy, UZ7HO, that made the SoundModem application also created a nice terminal app called, “EasyTerm.” More details on how to use the programs in their respective sections below.
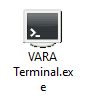
For the VaraFM route, you need the “VaraFM Modem” software as well as the “VaraTerminal” program.
Using SoundModem and EasyTerm
Launch SoundModem.

Configure it with your correct “Speakers” and “Mic” from the DigiRig or whatever soundcard interface you’re using. Then configure the “Modem.” Watch the video below for more details.
Then Launch EasyTerm.

Configure it with your callsign, TNC information (soundmodem agwpe interface) and get ready to connect. See the video below for more details.
Using VaraFM and VaraTerminal
Launch VaraTerminal
Configure Terminal to use VaraFM and configure VaraFM with your information. See video below.
***IMPORTANT***
Anywhere in those videos above that you see W4MSI (not W4MSI-7) that is where I’m configuring my personal station. You will need to use your own callsign in those fields. Since I am W4MSI I enter that in obviously. Where you will use my callsign is for what node you are connecting to and it’ll be formatted with an SSID of 7 …… W4MSI-7.
Alright, all that’s left is for you to get set up and connect in. I’m hopeful this will prove to be a useful system for offline/off-grid communication in the here and now and especially when there are grid-down types of events (think severe storms, cell outages, etc etc). If you need additional help, please reach out and I’ll do my best to accommodate.

2 Responses
Hmmmmm, now that I’m on my own, I might have to look into becoming a Ham operator and also doing this. I’ve saved this for future reference.
For sure. I think you would definitely enjoy the hobby. Many different things to explore.